Microsoft Windows Configuration
One-to-one devices
This section covers devices which are not joined to the Windows domain and always used by the same user, such as devices deployed in a one-to-one arrangement or bring your own device. Scroll down for information regarding Shared devices (including domain-joined) and Multiuser servers.
- If possible, configure your wireless network to use 802.1x (WPA-Enterprise) authentication and to send RADIUS accounting data to the Opendium system. Set the User Identification mode to RADIUS. If 802.1x authentication cannot be used, Set the User Identification mode to Single User Devices.
- If you are using 802.1x and RADIUS accounting, log the device onto the network with the user's credentials.
- If you are not using 802.1x and RADIUS accounting, the user must use the captive portal to authenticate.
If the network's HTTPS Decryption mode is set to Active, you must install your unique Opendium inspection certificate:
- Browse to https://<your Opendium host name>/opendium.crt (This URI is displayed on the Web tab).
- Go to Downloads.
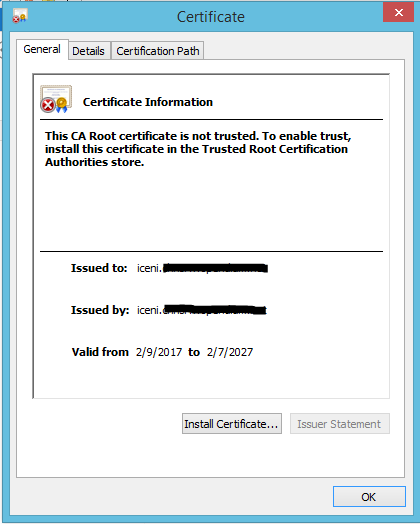
- Double click the certificate.
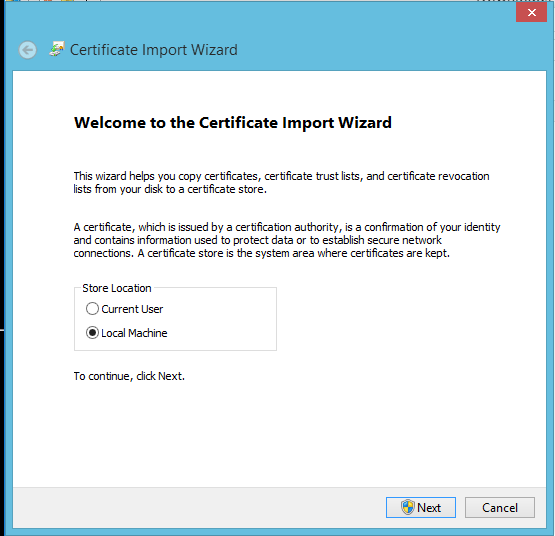
- Click Install Certificate, which will launch the Certificate Import Wizard.
- Select Local Machine and click Next.
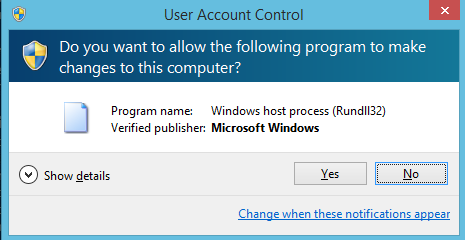
- Click Yes in the User Account Control box which pops up.
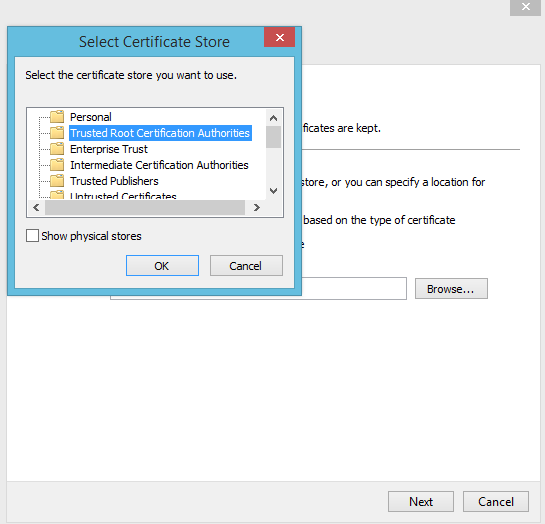
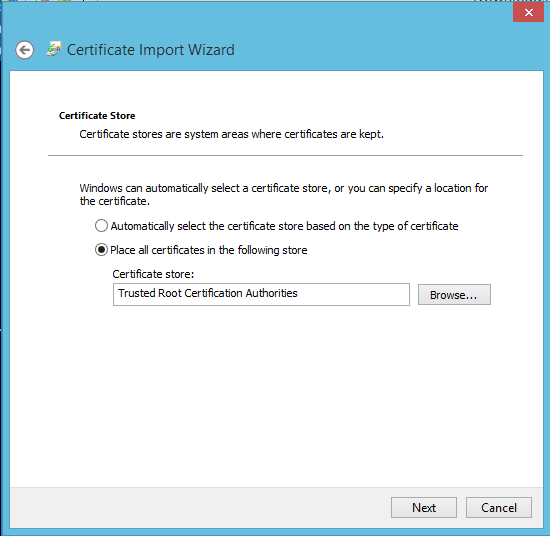
- Select Place all certificates in the following store and click Browse
- Select Trusted Root Certification Authorities and click Ok.
- Click Next in the Certificate Import Wizard.
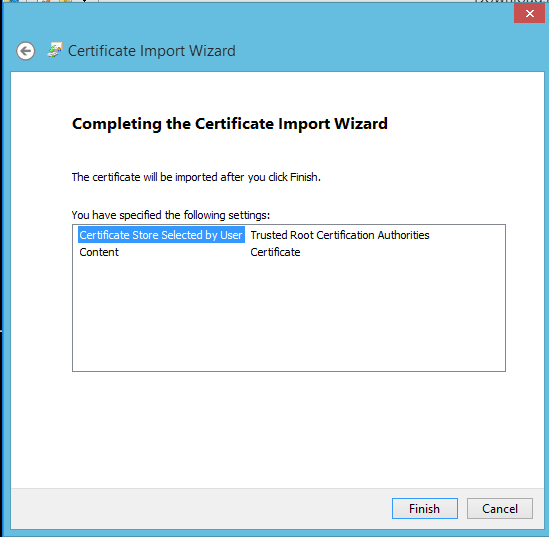
- The final page of the wizard lets you review your settings. Click Finish and the certificate will be imported.
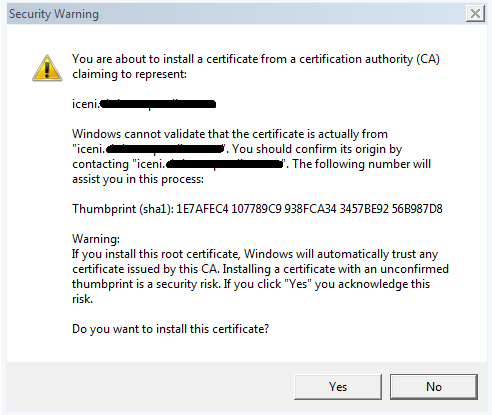
- A security warning will be displayed saying that Windows cannot validate the certificate. This is normal, click Yes.
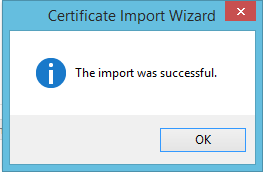
- The Certificate Import Wizard will pop up a box announcing that the certificate was successfully imported.
Troubleshooting
These instructions explain how to confirm that the Opendium inspection certificate is installed on a stand alone Windows machine. Windows versions 8 and 8.1 have a different style start menu to Windows versions 7 and 10, but the procedure is the same in all cases.
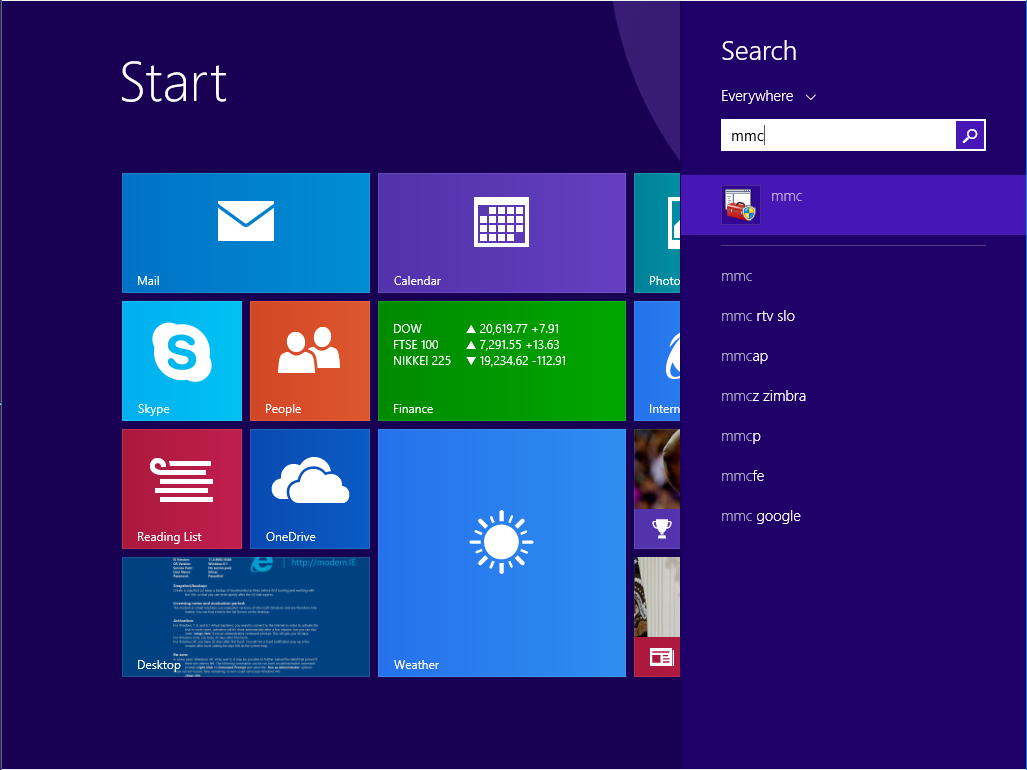
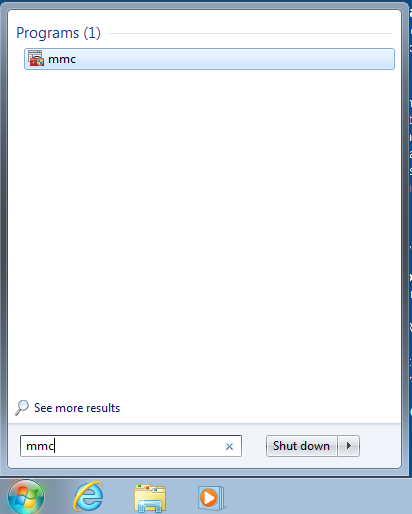
- Click Start or press the Windows key, then type mmc and click the mmc command.
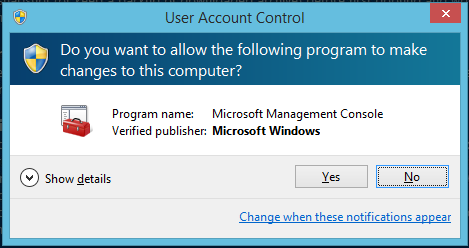
- If a User Account Control dialog pops up asking if you would like to allow Microsoft Management Console to make changes, click Yes.
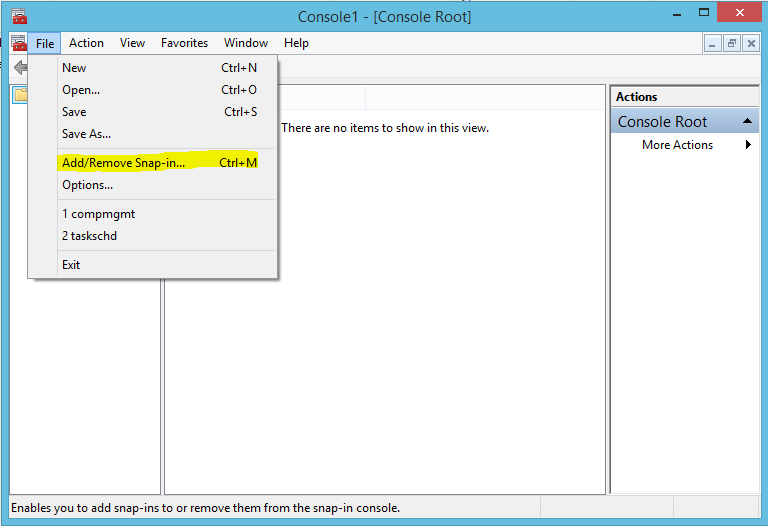
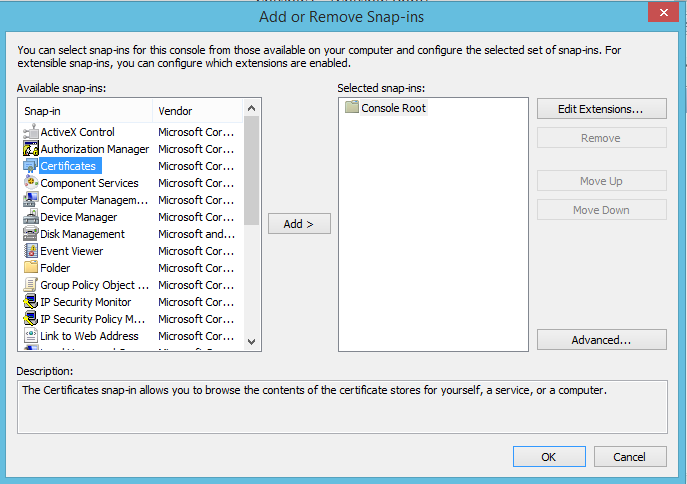
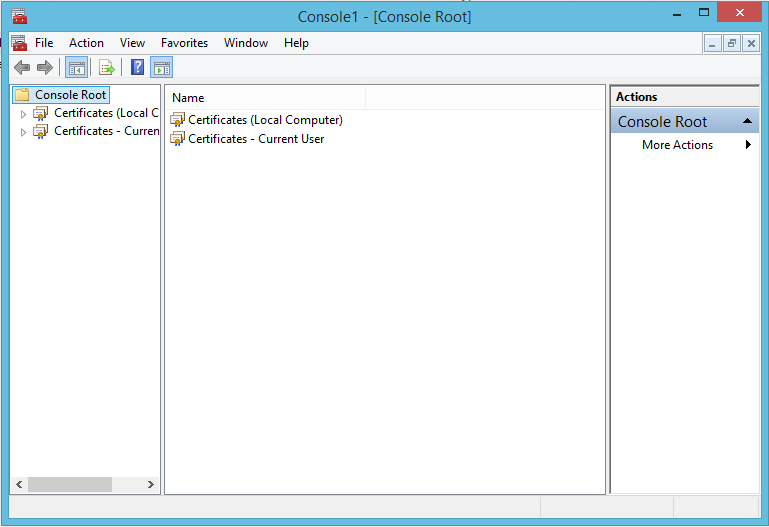
- Microsoft Management Console will then start, go to File -> Add/Remove Snap-in...
- Add the certificate snap-in by double clicking or highlighting Certificates and clicking Add.
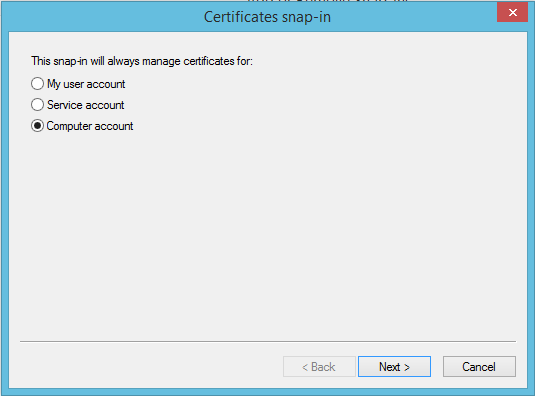
- Select the Computer account radio button and click Next.
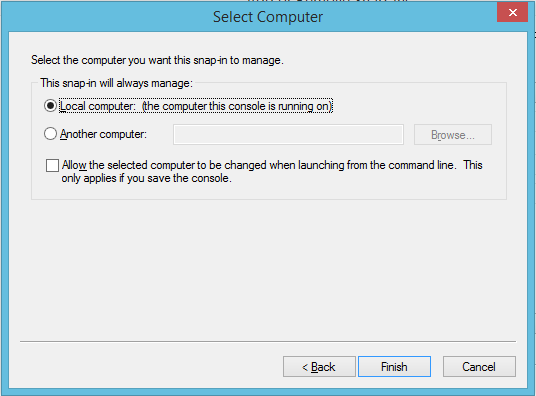
- Leave the Local computer radio button selected and click Finish.
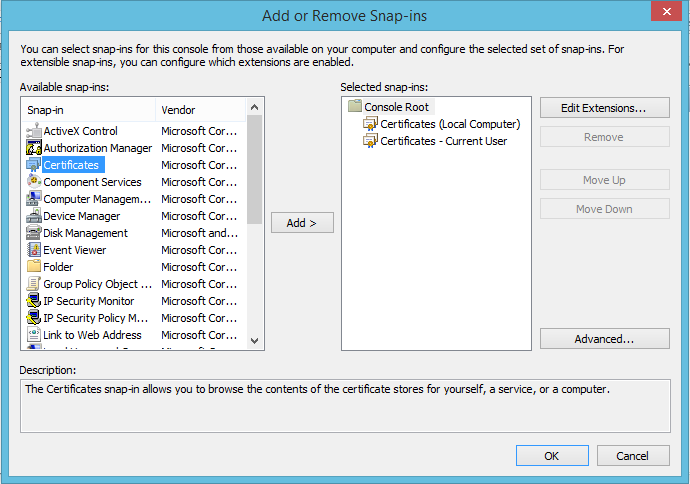
- You should now see Certificates (Local Computer) in the right hand pane.
- Click Ok, which will take you back to MMC and should show Certificates (Local Computer) in the left hand pane.
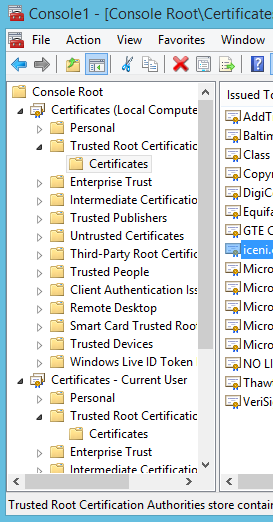
- Select Certificates (Local Computer) -> Trusted Root Certification Authorities -> Certificates
- You should see the Opendium certificate listed in the right hand pane.
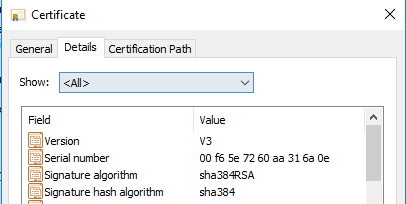
- For more details, double click the certificate and click the Details tab.
This section covers devices which are shared between multiple users (one user logged in at a time). Scroll down for information regarding multiuser servers.
Devices on the Windows domain
Client devices must use your non-transparent proxy, as this is a requirement of the Kerberos single signon protocol. We recommend using automatic proxy discovery wherever possible.
- The network that the device is being connected to should have Autoconfigure devices to use the proxy ticked in Permissions & Limits.
- Ensure that the wpad DNS records have been created on your internal domain.
- Ensure that your DHCP scopes are correctly configured.
- Group Policy should have no web proxy servers set, and "Automatically detect settings" should be ticked.
- The network that the device is being connected to should have its user identification profile set to Workstations.
If the network's HTTPS Decryption mode is set to Active, you must install your unique Opendium inspection certificate. This is usually done through Group Policy:
- Browse to https://<your Opendium host name>/opendium.crt (This URI is displayed on the Web tab).
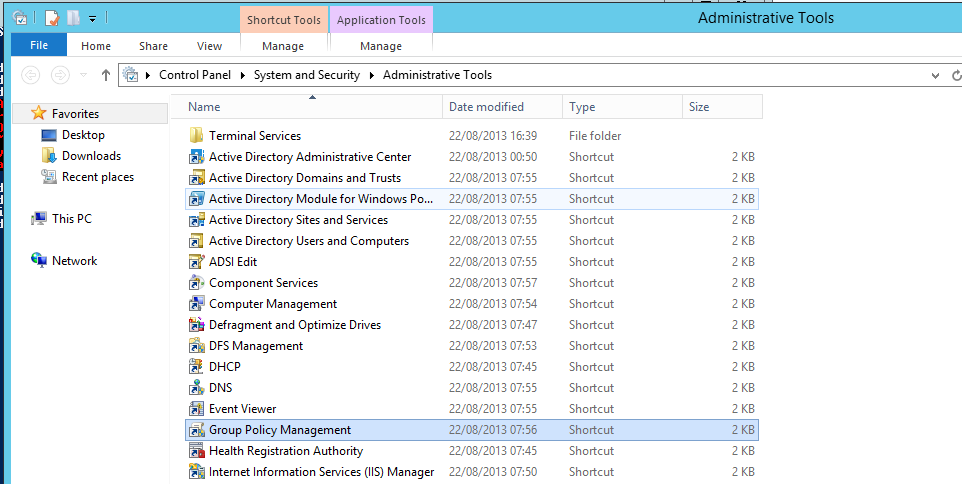
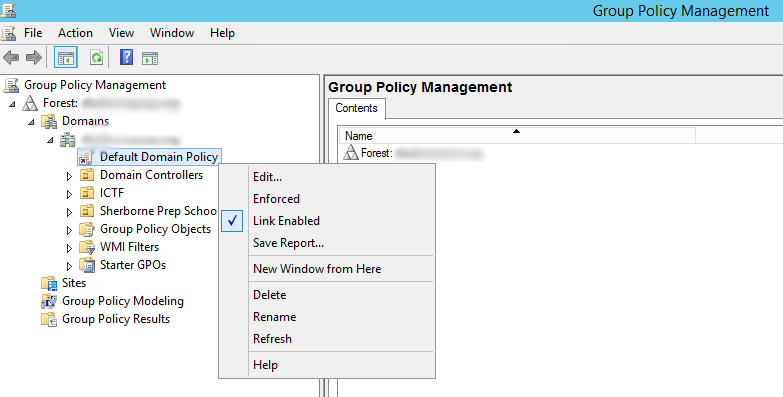
- Go to administrative tools on your domain controller and open Group Policy Management.
- Right click and edit Default Domain Policy within your domain.
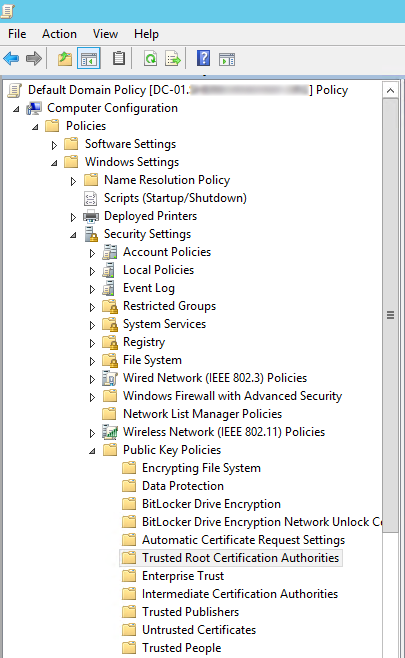
- Select Computer Configuration -> Policies -> Windows Settings -> Security Settings -> Public Key Policies -> Trusted Root Certification Authorities.
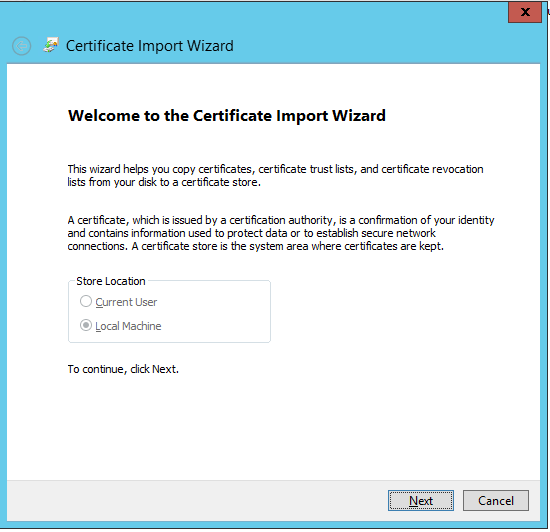
- Right-click the right hand pane and click Import..., which will start the certificate import wizard.
- Click Next on the first page of the import wizard.
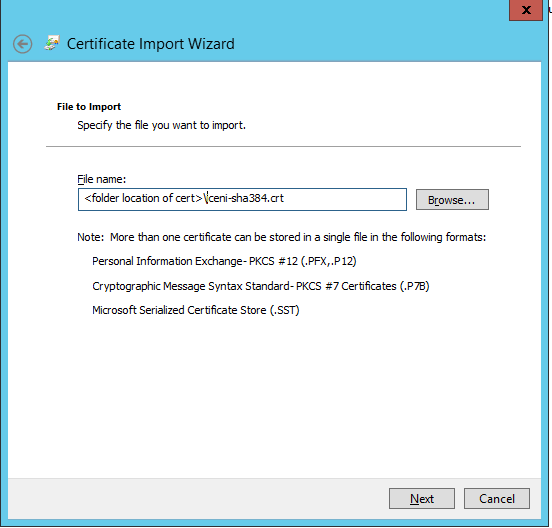
- Enter the file name of the new certificate, or use the Browse button to select it and click Next.
- The certificate location should be shown as Trusted Root Certification Authorities. If not, use the Browse button to set the store to Trusted Root Certification Authorities or Computer Configuration -> Policies -> Windows Settings -> Security Settings -> Public Key Policies -> Trusted Root Certification Authorities, and then click Next.
- The final page of the wizard lets you review your settings. Click Finish and the certificate will be imported into the GPO and it should then distribute across your domain.
Stand alone devices
Shared devices which are not connected to the Windows domain must authenticate through the captive portal:
- Configure your wireless network to use 802.1x (WPA-Enterprise) authentication and to send RADIUS accounting data to the Opendium system.
- Set the User Identification mode to RADIUS.
- Log the device onto the network with a user name that starts with "op-shared-". For example, "op-shared-windows". This user must exist on the Opendium system.
- The user must use the captive portal to authenticate.
- When the user has finished with the device, they must disconnect from the wifi (i.e. turn wifi off on the device, shut down the device, or place the device in a shielded box/cupboard).
If the network's HTTPS Decryption mode is set to Active, you must install your unique Opendium inspection certificate. See the instructions above in the One-to-one devices section.
Shared stand alone Windows devices cannot be supported on networks which do not support 802.1x and RADIUS accounting. If your network cannot support 802.1x, the only option is to disable User Identification.
Troubleshooting
Shared devices on the Windows domain should transparently authenticate using Kerberos single sign-on. If the device pops up authentication boxes rather than automatically authenticating, check that the clock on both the device and the domain controller are correct. The Opendium server provides an NTP service and we recommend that your machines use this to keep their clocks synchronised.
Multiuser Servers
This section covers servers which allow logins for multiple concurrent users, and are connected to the Windows domain. If the machine is not on the Windows domain, the only option is to disable User Identification.
Client devices must use your non-transparent proxy, as this is a requirement of the Kerberos single signon protocol. We recommend using automatic proxy discovery wherever possible.
- The network that the device is being connected to should have Autoconfigure devices to use the proxy ticked in Permissions & Limits.
- Ensure that the wpad DNS records have been created on your internal domain.
- Ensure that your DHCP scopes are correctly configured.
- Group Policy should have no web proxy servers set, and "Automatically detect settings" should be ticked.
- The network that the device is being connected to should have its user identification profile set to Multiuser Servers.
If the network's HTTPS interception mode is set to Active, you must install your unique Opendium interception certificate. This should be done through Windows Group Policy. See the instructions above in the Shared devices section.
Limitations
- Not all applications respect the proxy server settings and traffic for such software is instead caught by the transparent proxy and it is not possible to authenticate this traffic. Most of the user identification modes expect only one user to be logged into each device at any one time and can therefore infer which user the unauthenticated traffic belongs to based on recently authenticated traffic from the same device. Inferring traffic ownership in this way is not possible for systems that have multiple concurrent users, and therefore transparent proxy traffic from Multiuser Servers will not have an owner associated with it. Therefore, transparent proxy traffic will not be logged against an individual user, and will be filtered according to the Unidentified Users section of the Policy Modelling report.
- Not all applications support authenticated web proxy servers, and of those which do, some do not support Kerberos single signon. Many of the user identification profiles use heuristics to prevent broken software from being required to authenticate, and instead infer the traffic's ownership as described above. When the profile is set to Multiuser Servers these heuristics are disabled and all software using the non-transparent proxy is required to authenticate. This may result in some applications failing to connect to the internet, or spurious pop-up authentication boxes.
