Allowing Facebook, without allowing other social networking sites
Today we're looking at a reasonably common situation: administrators often want to allow their users to use Facebook, without opening the floodgates and allowing access to every other social networking website. There are a couple of methods of doing this, and we'll discuss both and explain the advantages and disadvantages of each. We're using Facebook as an example here, but you can adapt these steps to other websites and categories as you see fit.
This is the first in a regular series of "how to" articles to provide step by step instructions on how to do some common things with Web Gateway and UTM. By following through these examples, you can gain an understanding of how to configure your system to work exactly how you need it to.
Modifying the filtering categories
The best way to configure this is to exclude Facebook from the Social Networking category, so it is no longer blocked by that category. Since we're only editing one category, all of the other filtering remains in place.
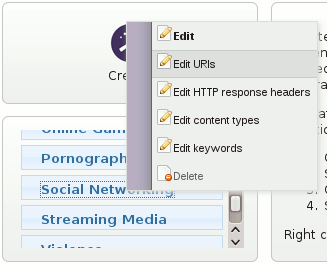
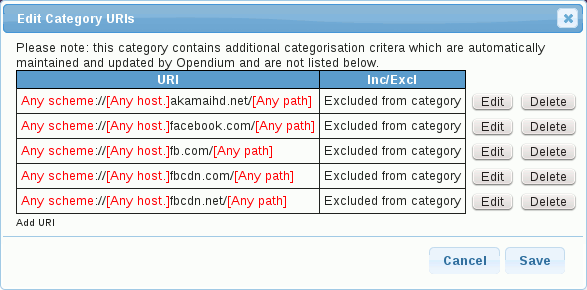
- Go to Filtering Categories. You'll see all of the categories listed on the left hand side - right click the Social Networking category and select Edit URIs. A box will pop up showing you the web addresses that you have previously added to that category. We need to exclude all the domains that Facebook uses from the category, these are: akamaihd.net, facebook.com, fb.com, fbcdn.com and fbcdn.net.
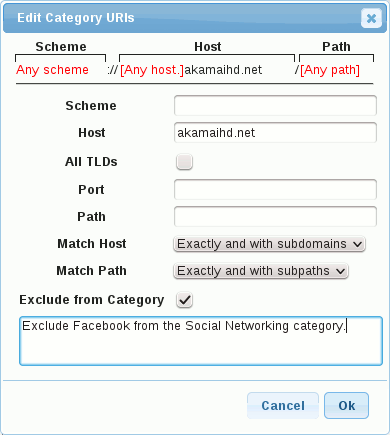
- Click the Add URI link at the bottom of the list of addresses and a second popup box will appear for you to enter the web address in. Enter akamaihd.net into the Host field and tick the Exclude from category checkbox. Its a good idea to add a comment to explain what you are doing, for your future reference. Leave all of the other settings set to their defaults and click Ok. Redo this for each of the other domains (facebook.com, fb.com, fbcdn.com and fbcdn.net).
- Finally, hit the Save button to save the changes to the category.
There you have it, your system no longer considers Facebook to be a social networking website, so it won't be blocked by the Social Networking category.
A naïve approach - whitelisting
We can naïvely allow Facebook by simply whitelisting it. This approach is very easy to understand, but has the disadvantage that it completely disables all filtering for Facebook. As such, we don't recommend this method, but it is listed here for completeness.
You can either use the standard Whitelisted websites override, or you can create a new independent override. We'll create a new one here, but you can just skip this step if you want to use Whitelisted websites instead.
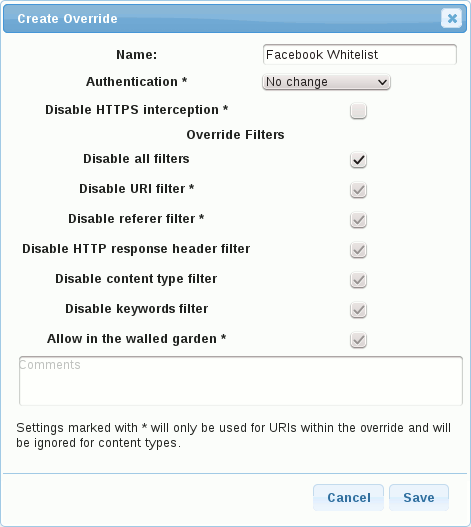
- In the Override Editor, click the Create button in the toolbox and enter a name for the override. Tick the Disable all filters checkbox and leave all of the other settings the same. Its a good idea to enter a comment to explain the purpose of the override, for your future reference. Once you're done, hit Save and the new override will appear in the list on the left.
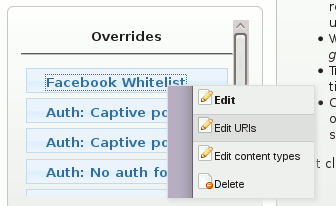
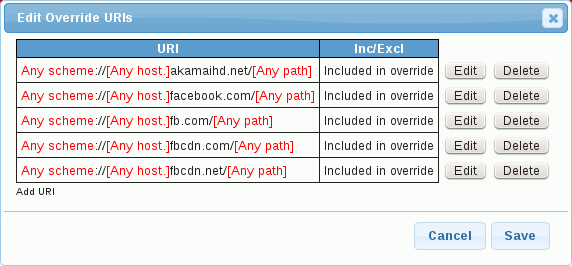
- Now, we need to add all the domains that Facebook uses to the override. These are: akamaihd.net, facebook.com, fb.com, fbcdn.com and fbcdn.net. So, right click the override and choose the Edit URIs option. A box will pop up showing you all of the web addresses that are currently in that override (which will be empty if you just created the override).
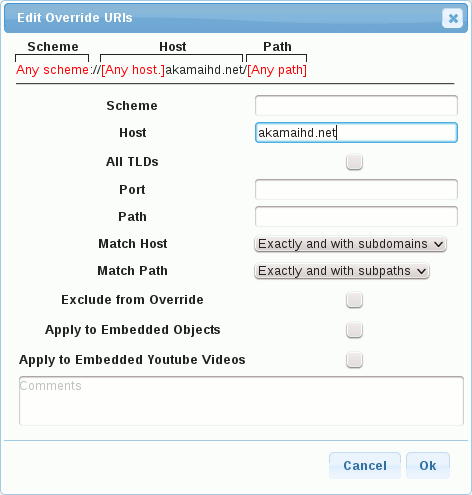
- Click the Add URI link at the bottom of the list of addresses and a second popup box will appear for you to enter the web address in. Enter akamaihd.net into the Host field. Again, you can add a comment if you wish to describe what the configuration is for. L eave all of the other settings set to their defaults and click Ok. Redo this for each of the other domains (facebook.com, fb.com, fbcdn.com and fbcdn.net).
- Finally, hit the Save button to save the changes to the override.
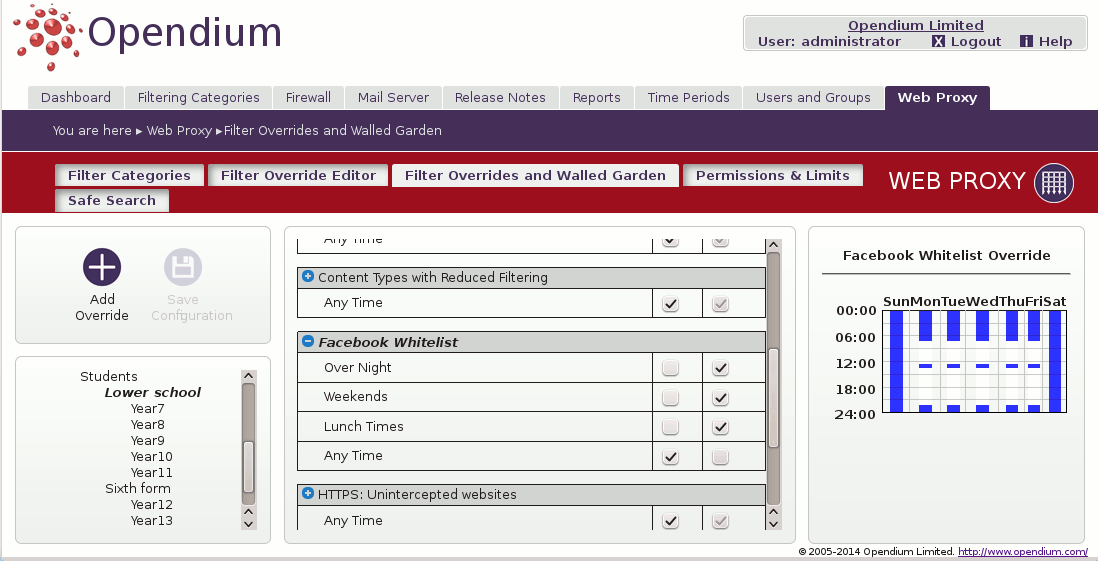
- Now we've created an override that whitelists Facebook, we need to turn it on. Go to the Overrides tab and select the user group that you would like to be allowed to access Facebook. Click the Add Override button, select your new override from the pop up box and hit Ok. Click the Save button and you're done. If you used an existing override instead of creating a new one, it may already be enabled. If so, you can simply skip this step.
That's it - all filtering for Facebook is now disabled for that user group.
